WINDOWS
Windows 10
There are several ways to split a screen in Windows 10, but the easiest is with Snap Assist. This feature has to
be enabled in Start > Settings > System > Multitasking, although it should be enabled by default.
Snap Assist lets you drag a window to a corner or side of the screen to “snap” it there, which in turn makes
room for other apps to be snapped in the resulting empty screen space.
To split your screen in Windows 10 with Snap Assist using the mouse:
1.
Open two or more windows and/or applications for practice.
2.
Click one of the windows to make it the active window, then Click WIndowsKey(or Start Key) and the left or
right keyboard button. OR
3.
Place your mouse on an empty area at the top of one of the windows, hold down the left mouse button,
and drag the window to the left side of the screen. Move it all the way over, as far as you can go, until your
mouse won't move any more.
4.
Let go of the mouse to snap that window to the left side of the screen. It should now fill half the screen, or
the corner if you managed to drag it there.
5.
Select any of the other windows that are now open on the right side to instantly snap it to the right side of
the screen.
6.
Now that the two screens are beside each other, you can drag the dividing line that separates them to
resize both windows simultaneously. This is helpful if you need to see more of one and can manage a
smaller view for the other.
Windows 7
Windows 7 was the first version of Windows to support the Snap feature. It was enabled by default.
To use the Snap feature in Windows 7 to position two windows side-by-side:
1.
Open two windows and/or applications.
2.
Place your mouse in an empty area at the top of any open window, hold down the left mouse button, and
drag the window to the left side of the screen, toward the centre of that side.
3.
Let go of the mouse. The window will take up half the screen.
4.
Repeat Step 2 for the second window, this time dragging to the right before letting go of the mouse button.
The window will take up the other half of the screen.
These instructions were adapted from Livewire.com
https://www.lifewire.com/split-screens-in-windows-
4160920#:~:text=Split%20Your%20Screen%20in%20Windows%2011%20and%2010%20With%20Snap%20Wi
ndows&text=Snap%20Windows%20lets%20you%20drag,the%20resulting%20empty%20screen%20space.&te
xt=To%20turn%20on%20this%20feature,%3E%20Settings%20%3E%20System%20%3E%20Multitasking.
For other instructions on how to SPLIT your SCREEN on a windows device CLICK HERE or follow the
instructions for Split Scree on the Chrome Bowser below


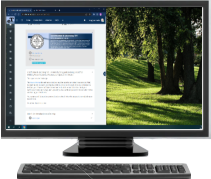


2) The Browser Window should now appear on
one side of your Monitor Screen.
Place your mouse over the “TAB” you want on the
other side of your Screen. Click, Hold and Drag
the tab to the other side of the Monitor Window,
all the way until your mouse curse touches the
side of the Monitor Window.
The tab should expand to a second Browser
Window beside the first.
Click, Hold & Drag to the right or
Left side of the Monitor Screen


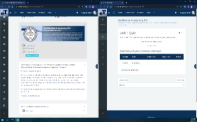
To Split your Screen between two Tabs on the Chrome Browser
1)
With 2 or more tabs open, Click and Hold the top bar of the web browser and drag
the ‘Browser Window’ to the Left or Right side of the monitor.
